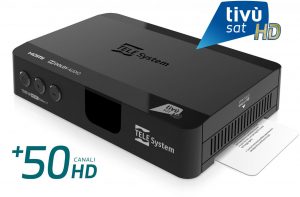
Telesystem TS9018 Tivùsat Receiver Stuck on Boot Loop

Is you Telesystem TS9018 Tivusat Satellite Receiver suffering from being unable to switch on and stuck in a Boot Up Loop?
This may be because the receiver has tried to update to a newer software version but has failed or become corrupted.
It is possible to manually load new software onto the Telesystem receiver so that it will boot up and allow you to continue to the menu and view your Italian Satellite TV Channels
Please Note. This is the latest software as of from October 2021 but please check that there is not a newer version available before you attempt to restore your receiver. We can not be held responsible if you damage your receiver.
Release note SW v316 (compared to previous v271):
- Added option to deactivate the energy saving standby state to speed up the access of the decoder (see ” Menu -> Settings -> Energy management -> Standby mode “)
- Added possibility of forced factory reset (reset) of the decoder.
- Adaptation of the channel call within the quick channel list according to the LCN position.
- Improved stability software update via satellite (OTA) with the possibility of forced exit.
CLICK HERE FOR TELESYSTEM USB SW v316 SOFTWARE
INSTRUCTIONS
USB UPDATE
- Make sure you have downloaded the correct software update dedicated to your receiver (check version and product / article number) and unzip it if it is compressed (file type “.zip”).
- Copy the software update file called “ oad.eusb ” (NB: do not rename the file) in the root directory of a USB key formatted in FAT32.
- With the receiver switched on in viewing mode, insert the aforementioned key into the USB port of the receiver
- Go to the “ Settings -> Update -> Software Update ” menu , start the search for new software by pressing the RED button (Update now), then confirm the update when prompted.
- Wait for. The receiver will restart automatically, and then return to viewing mode when the update is completed.
IMPORTANT! During the update, do not interact with the devices and do not disconnect the power supply: risk of irreversible damage to the receiver!
- To test the “field to receiver actual successful update, installed refer SW Version ” from the menu ” Information -> Receiver Information “
- If the update fails, it is recommended that you try again using a USB v2.0 key
- After a software update, it is advisable to perform a factory reset (via the ” Settings -> Update -> Factory reset ” menu ), then repeat the first installation procedure
FORCED UPDATE FOR POSSIBLE RESTORE
Make sure you have downloaded the correct software update dedicated to your receiver (check version and product / article number) and unzip it if it is compressed (file type “.zip”).
Copy the software update file called “ oad.eusb ” (NB: do not rename) in the root directory of a USB key formatted in FAT32.
With the receiver off (power supply disconnected), insert the aforementioned key into the USB port of the receiver.
Plug in the receiver power supply and press and hold the Middle button on the receiver front panel (Down Arrow Button) until the front panel LED starts flashing quickly, then release the button.
Wait for; the receiver will restart automatically and show the WELCOME menu, then repeat the first installation procedure.
NOTE
- To test the “field to receiver actual successful update, installed refer SW Version ” from the menu ” Information -> Receiver Information “
- If the update fails, it is recommended that you try again using a USB v2.0 key